
Model Training
After successfully annotating enough products, you are able to create and train a prediction model. The model will learn a mapping between some selected product attributes (the training attributes) and your new attribute. It will then be able to select the most likely attribute value for each product based on your annotations and the information available in the training attributes. This means an attribute value can be assigned not only to the products you didn’t manually annotate, but to all the ones yet to arrive to your product feed.
How many Products are Enough to Train a Model?
Section titled “How many Products are Enough to Train a Model?”The answer to this question depends heavily on the complexity of the attribute the model should learn, as well as on the diversity of your products and the informativeness of the selected training attributes. It is best to annotate more and more products iteratively and train new models until the desired performance is reached. There are, however, a couple of things you should keep in mind:
- Even if you have annotated thousands of products, if a certain
attribute value is assigned to just a few of them, the model would
not be able to learn any useful patterns for it.
- In this case, you might consider grouping certain values together or even removing them.
- A bare minimum of 10 products per attribute value is absolutely
needed. Any attribute value with less annotations would simply be
ignored by the model.
- If less than 2 values have enough annotations, there would be no use for a model at all – creating one would always fail.
Model Creation
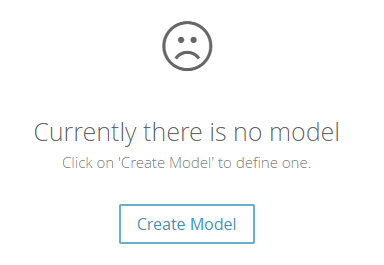
Section titled “Model Creation”In the Annotation view, on the right-hand side, you see a text that says, “Currently there is no model” and a button to create a new model.
Set Model Properties
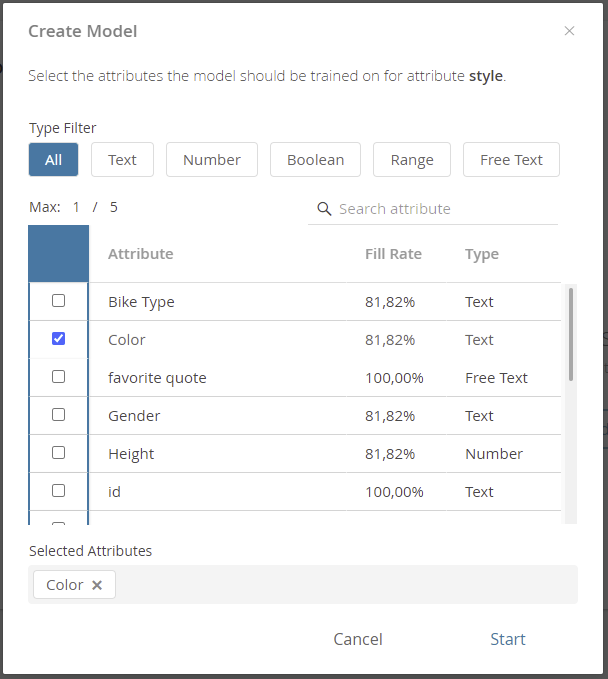
Section titled “Set Model Properties”Clicking on the “Create Model” button opens a modal window. In this window you have to set the training attributes for the new model. An example window is depicted below.
Which attributes should I select?
You should select only the most informative attributes. These could be:
- The ones you used during the annotation process to decide which attribute value should be assigned to each product.
- The ones you as a domain expert believe contain useful information regarding the new attribute.
Remember, it is always best to start simple. Adding a training attribute which does not contain any useful information regarding the new attribute would only introduce unnecessary noise in the model input. Hence, the performance would most likely drop instead of improving with the addition of unneeded attributes. It is recommended to start with just a single attribute and add more iteratively until the models efficiency stops increasing.
To find the attributes you can use the several filter settings. You can search for
- the attribute name (see the “Search attribute” input field)
- the type (using one of the type filter button above the table)
All selected attributes are displayed as tags below the attribute list. With the aid of the “x” icon all attributes can be removed again.
Note
Note: - No attribute is preselected if you enter this window. That should help you to only select these attributes you really think you need for creating a good model.
- The maximum number of attributes you can select is 5. Technically, more attribute were possible but the more attributes you select it is more likely to get unnecessary noise (worse results) for the model predictions.
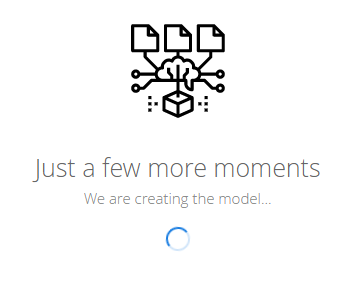
If you click on the “Start” button the model creation process is triggered. You should see the following processing screen:
Model Card Structure
Section titled “Model Card Structure”After the model was successfully created, a model card is shown. It contains the following elements:
-
Name:
The model name; initially set as a combination of attribute name + the suffix “Model” -
Last Modified:
Date indicating when the model was created or changed (retrained) the last time. -
Status:
Two states are possible:- Active: Model was applied to the data feed.
- Inactive: Model was not applied, deactivated or invalid/incompatible (see model states below).
-
Performance:
The results of the model evaluation (see performance metrics below) -
Trained Attribute Set:
This list contains all attributes which were used to train the current model. -
Retrain Model:
Opens the same modal window like after clicking the “Create Model” button. You can either use the same set of training attributes again or choose a different set. -
Delete:
Removes the model permanently. All predicted annotations get lost. -
Apply to Data:
Applies the created model to all products for the new attribute. Afterwards, all products have a product annotation.
Retraining
Section titled “Retraining”If you are not happy with the prediction results of the model, it is possible to retrain it to get better results. Furthermore, for some model states (invalid and incompatible) a retraining is mandatory to use the attribute in your Product Guide.
The structure of the modal window is exactly the same as for the model creation. The only difference is that the selected attributes are the last used training attributes. After adapting your changes and clicking the “Start” button, the model will be retrained. Afterwards you can look at the performance stats and value predictions to see if the adaptations were worth it.
Important
Warning: You cannot revert the model to an older state. That means after the retraining the old model status is gone for good.
Model States
Section titled “Model States”Your model can reach different state levels during its existence. Each level is worse than the upper one.
Furthermore, a state can only get worse for one or multiple levels, but not vice versa. The only level where it can reach upwards again is for the state ‘valid.‘
1) Valid
Section titled “1) Valid”The annotation model is conformal with the annotated values and product data.
This state should always be the aim.
2) Outdated
Section titled “2) Outdated”The model is still valid, but there are new annotation values which could change the model predictions.
You should consider retraining the model with the new information.
Representation in the Workbench
Section titled “Representation in the Workbench”
3) Invalid
Section titled “3) Invalid”The model is invalid due to e.g. new/less synthetic attribute values or different attribute properties.
In this case a model retraining is mandatory. Otherwise, the attribute cannot be applied to the data respectively used in the Concept Board.
Representation in the Workbench
Section titled “Representation in the Workbench”
4) Incompatible
Section titled “4) Incompatible”The model is incompatible due to e.g. lost training attributes in the data feed.
To use the created attribute in the Product Guide, the model has to be retrained.
Representation in the Workbench
Section titled “Representation in the Workbench”
Performance Metrics
Section titled “Performance Metrics”In the model performance section, you see three metrics - the model accuracy, the number of matching predictions (same prediction as annotation) and the number of annotated products the model has been trained on. Note that the percentage of the last is determined based on the number of products currently in your product feed and can hence be over 100% if some products were removed.
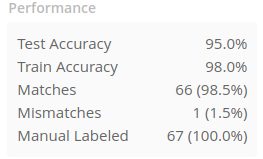
Despite the potential scarcity of annotated products the best possible model will be trained. Therefore the annotated products are split in 5 different ways, each containing a training data set of 80% of the products and a test data set of the remaining 20%. The achieved model accuracy on each of these 5 splits is measured on both: the training and the test data sets. The results are presented with averaged values. Then, the model is trained on the entire data set containing all product annotations and present you the amount of matches and mismatches finally achieved.
Measuring model accuracy, however, is not a straightforward task. One way is to measure the percentage of the annotated attribute values the model predicted correctly. But imagine you have assigned the same attribute value to 80% of the products you annotated. Then a model predicting that attribute value independent of the product would be 80% accurate. Despite the high accuracy, that probably isn’t a very useful model.
Instead, for each attribute value, the corresponding annotated products are considered and the percentage of these on which the model prediction was correct is measured. The final accuracy score is then the average over all attribute values. In the scenario above, considering there are 2 possible attribute values, the model would achieve 100% and 0% accuracy on these. This would result in a final accuracy of 50%, which better expresses that the above mentioned model is as well suited for determining the correct attribute value for each product as tossing a coin.