
Annotation Settings
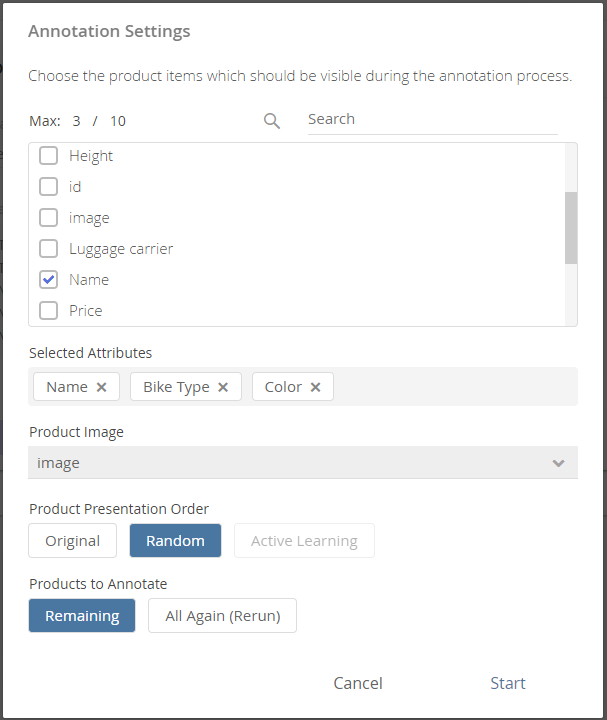
The annotation settings modal window is shown every time a new annotation process is started by clicking the “Start Annotation” button in the Annotation view. Settings from the previous session are stored and preselected the next time the process is started. An example of such settings modal window is depicted in the image below.
Structure
Section titled “Structure”The modal window is structured into four main parts. Each of them is described in the next sections.
Attribute Selection
Section titled “Attribute Selection”Within the attribute selection you can decide which information from your products should be visible during the annotation process. For example, if you select the attribute Color, the color information is displayed for each product. This information should help you to decide which attribute value annotation is most suitable for each product.
You can use the search bar to easily find an attribute. All selected attributes are displayed below the checkbox list as tags (max. selection is 10). They can be removed via the “x” icon in the tags or by deselecting the attribute in the checkbox list.
The order of the selected attributes represents the order within the annotation. Hence, the first selected attribute is the first information you see during the annotation.
Info
Note: If you have mapped the core attributes “name” and “description” during the data feed import (see Set the Attribute Mapping) both attributes are automatically preselected.
Product Image Attribute Selection
Section titled “Product Image Attribute Selection”Like in the attribute selection above, you have to choose an attribute out of your data feed. In contrast, the information of this attribute is not displayed as text information but rendered as an image. That means that the image URL is converted into an image. With the aid of that image, it is easier to identify the product or decide which attribute values need to be annotated.
Info
Note: If you have mapped the core attribute image during the data feed import (see Set the Attribute Mapping) the image selection is automatically preselected with this attribute.
Product Presentation Order
Section titled “Product Presentation Order”You can select when you want to see the products. You can choose between these three options:
-
Original:
See all products in the order of your data feed. That means that the first product of your data file will be the first product to annotate and so on. -
Random:
The product sequence you will see during the annotation process is completely random. That means that it is unpredictable which product will be presented next. -
Active Learning:
The product sequence is determined by the prediction model, prioritising more informative products to be labeled first. The model will try to select products for which it is most uncertain what the correct attribute value is or which are most dissimilar from the already annotated ones with respect to the training attributes.Caution
Warning: This strategy is only appropriate when the selected training attributes are informative enough to determine the correct attribute value and when the model is already performing decently. If, in contrary, the model is performing very poorly, it might introduce sampling bias and require even more products to be annotated in this manner as opposed to applying the other strategies to achieve a similar model improvement.
As a rule of thumb, you might want to achieve at least 70% accuracy before using this strategy to reduce the annotation effort required to take your model to the next level.
| Advantages | Disadvantages | |
|---|---|---|
| Original |
|
|
| Random |
|
|
| Active Learning |
|
|
Annotation Mode
Section titled “Annotation Mode”Lastly, you have to decide which products you want to annotate. This step is only relevant if you already have product annotations. The two decisions are:
-
Remaining:
You only see products which have not been annotated at all. -
All Again (Rerun):
All products independent of current annotation status are shown during the starting annotation. All existing annotations are deleted.