...
When you enter the Annotation view for the first time you can see the following elements:
- In the left corner, a button to return to the Attribute Creation view
- A statistic board which is updated after every product annotation
- The "Start Annotation" button
- A button to externally upload an existing annotation
- An info text which suggests to you to begin starting the annotation process
Clicking on "Start Annotation" opens a modal window where you have to configure some settings. These settings help you during the annotation process, to decide which attribute value you should assign to each product. Read more about the settings on the page Annotation Settingscan configure the annotation process. The settings influence the order in which products are presented to be annotated, as well as what product information is shown. Read more on the Annotation Settings page.
Annotation Process
...
When you start the annotation process the view looks something like this:
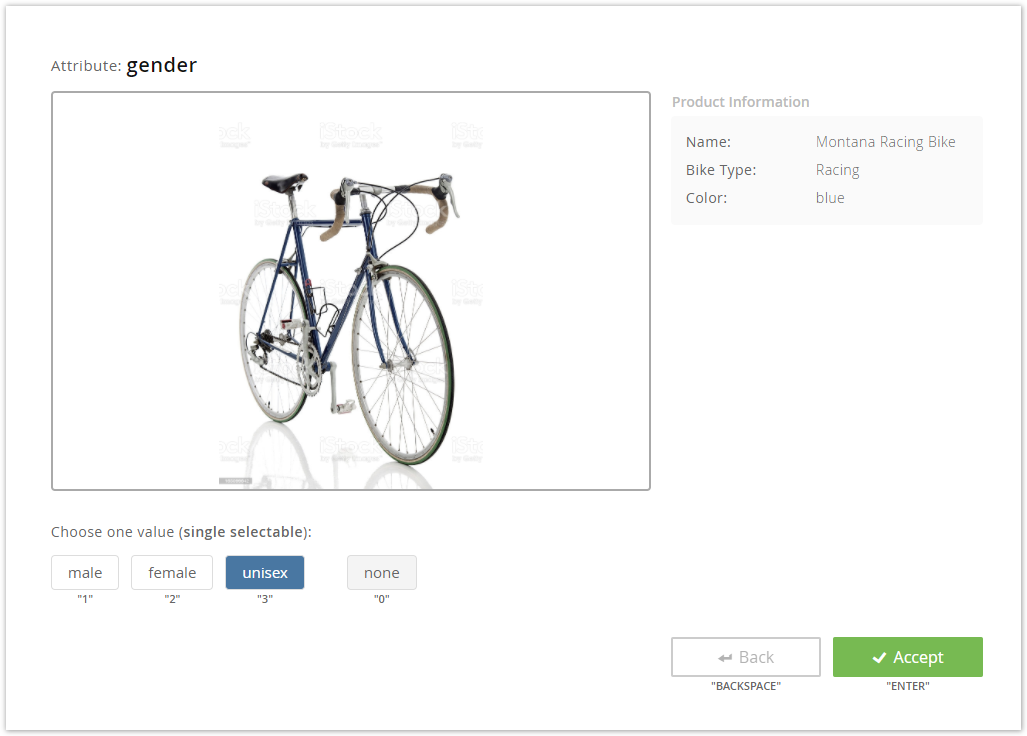
On the top, you see your created attribute name. Below, the product image is displayed along with further product information which you set configured in the Annotation Settings.
...
Attribute value selection:
Choose one or multiple values from the created attribute.
In case you are not sure which value to select and wish to skip annotating this product, you can select the value "none".Note title Note The value "none" represents an empty annotation. The AI prediction model won't consider any of the products annotated as "none". In production, those products will be assigned an attribute value as predicted by the model.
In case you expect there will be products which don't belong to any of the categories represented by the attribute values, and want the model to express that, you might consider adding a separate value such as "other".- Accept annotation:
Saves the value selection(s) and displays the next product to annotate. - Go to previous annotation:
Shows the last annotated product. It can be used to change an older annotation value.
...
| Info | ||
|---|---|---|
| ||
You can also annotate the products without using the mouse. A label is displayed below all the control elements (e.g. "1" or "ENTER"). If you press this key on your keyboard the corresponding value is selected. This feature saves time and is more comfortable to use. |
| Note | ||
|---|---|---|
| ||
The AI prediction model isn't capable of learning any useful patterns if it doesn't observe enough data. Therefore, a minimum of 10 products must be annotated per attribute value. All attribute values with less corresponding products are simply ignored. At least two attribute values need to have enough annotations, otherwise it wouldn't make sense to train a model at all, since it would always predict the value with the most annotations. Thus any attempt to train a model with fewer annotations would fail. The minimal amount of annotations required to train an accurate model is highly dependent on the complexity of the attribute and the availability of informative data attributes to learn from. It is perhaps best to iteratively train new models and annotate further products until the desired model accuracy is reached. |
...