This page describes how to upload your product data file in the Product Data view. Before working with this view, please make sure you have read the Product Data Feed Requirements.
Table of Contents:
How to Enter the Product Data View?
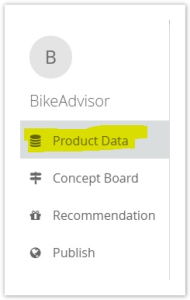
To enter the Product Data view, select an existing Product Guide in the Product Guide Overview Table and then click on the Product Data item in the navigation bar on the left side of your browser (see image below).
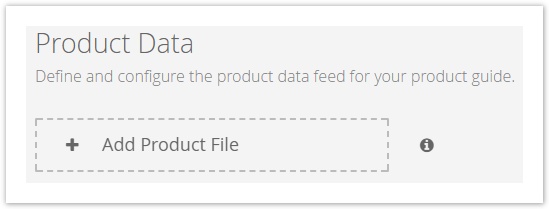
Add a Data File
A new data file can be uploaded by clicking the button "Add Product File". The product data file has to fulfill specific requirements that are described in Product Data Feed Requirements. You can also read the requirements by clicking the info icon right next to the "Add Product File" button.
Select a Connector Type
At first you have to decide how the product data should be connected to your Product Guide. You can choose between three variants:
- Local Upload
- HTTP
- SFTP
Local Upload
Choose this variant if you have a local CSV file on your PC. Click on "Upload File" and select the product data file in the explorer.

HTTP
If your product data file is available under a HTTP(S) link, select the connector type "HTTP". After selecting this option you will see three buttons to configure the HTTP settings.
For more details, please visit the HTTP subpage.
SFTP
In case that your data file is accessible via SFTP select the connector type "SFTP". Selecting this option provides you with the exact same three buttons like HTTP.
For more details, please visit the SFTP subpage.
Important Notes for HTTP or SFTP Data Download Jobs
When providing your product data to excentos via automated download jobs - no matter if provided on HTTP or SFTP server - please pay attention to the following topics:
- If excentos provided the SFTP server for you, please upload your data file into the folder "www".
- Please do not change the names of the folder or file without prior notice.
- If you use XLS, XLSX or ODS files (instead of CSV files), please make sure that you do not rename the table within the spreadsheet file.
Upload Process
After selecting a file, a modal window occurs and illustrates an upload wizard. That wizard contains three to five steps (the additional two can only appear when a file is updated). The following subpages describe all wizard steps in more detail.
- Preview your Data
- Set Include and Exclude Filters
- Evaluate Attributes
- Evaluate Values
- Set the Attribute Mapping
Related Articles
Read our FAQ regarding Product Data to learn when uploaded product data is live in the Product Guide, or how to combine changes/adaptations in your Product Guide and in your product data at the same time.